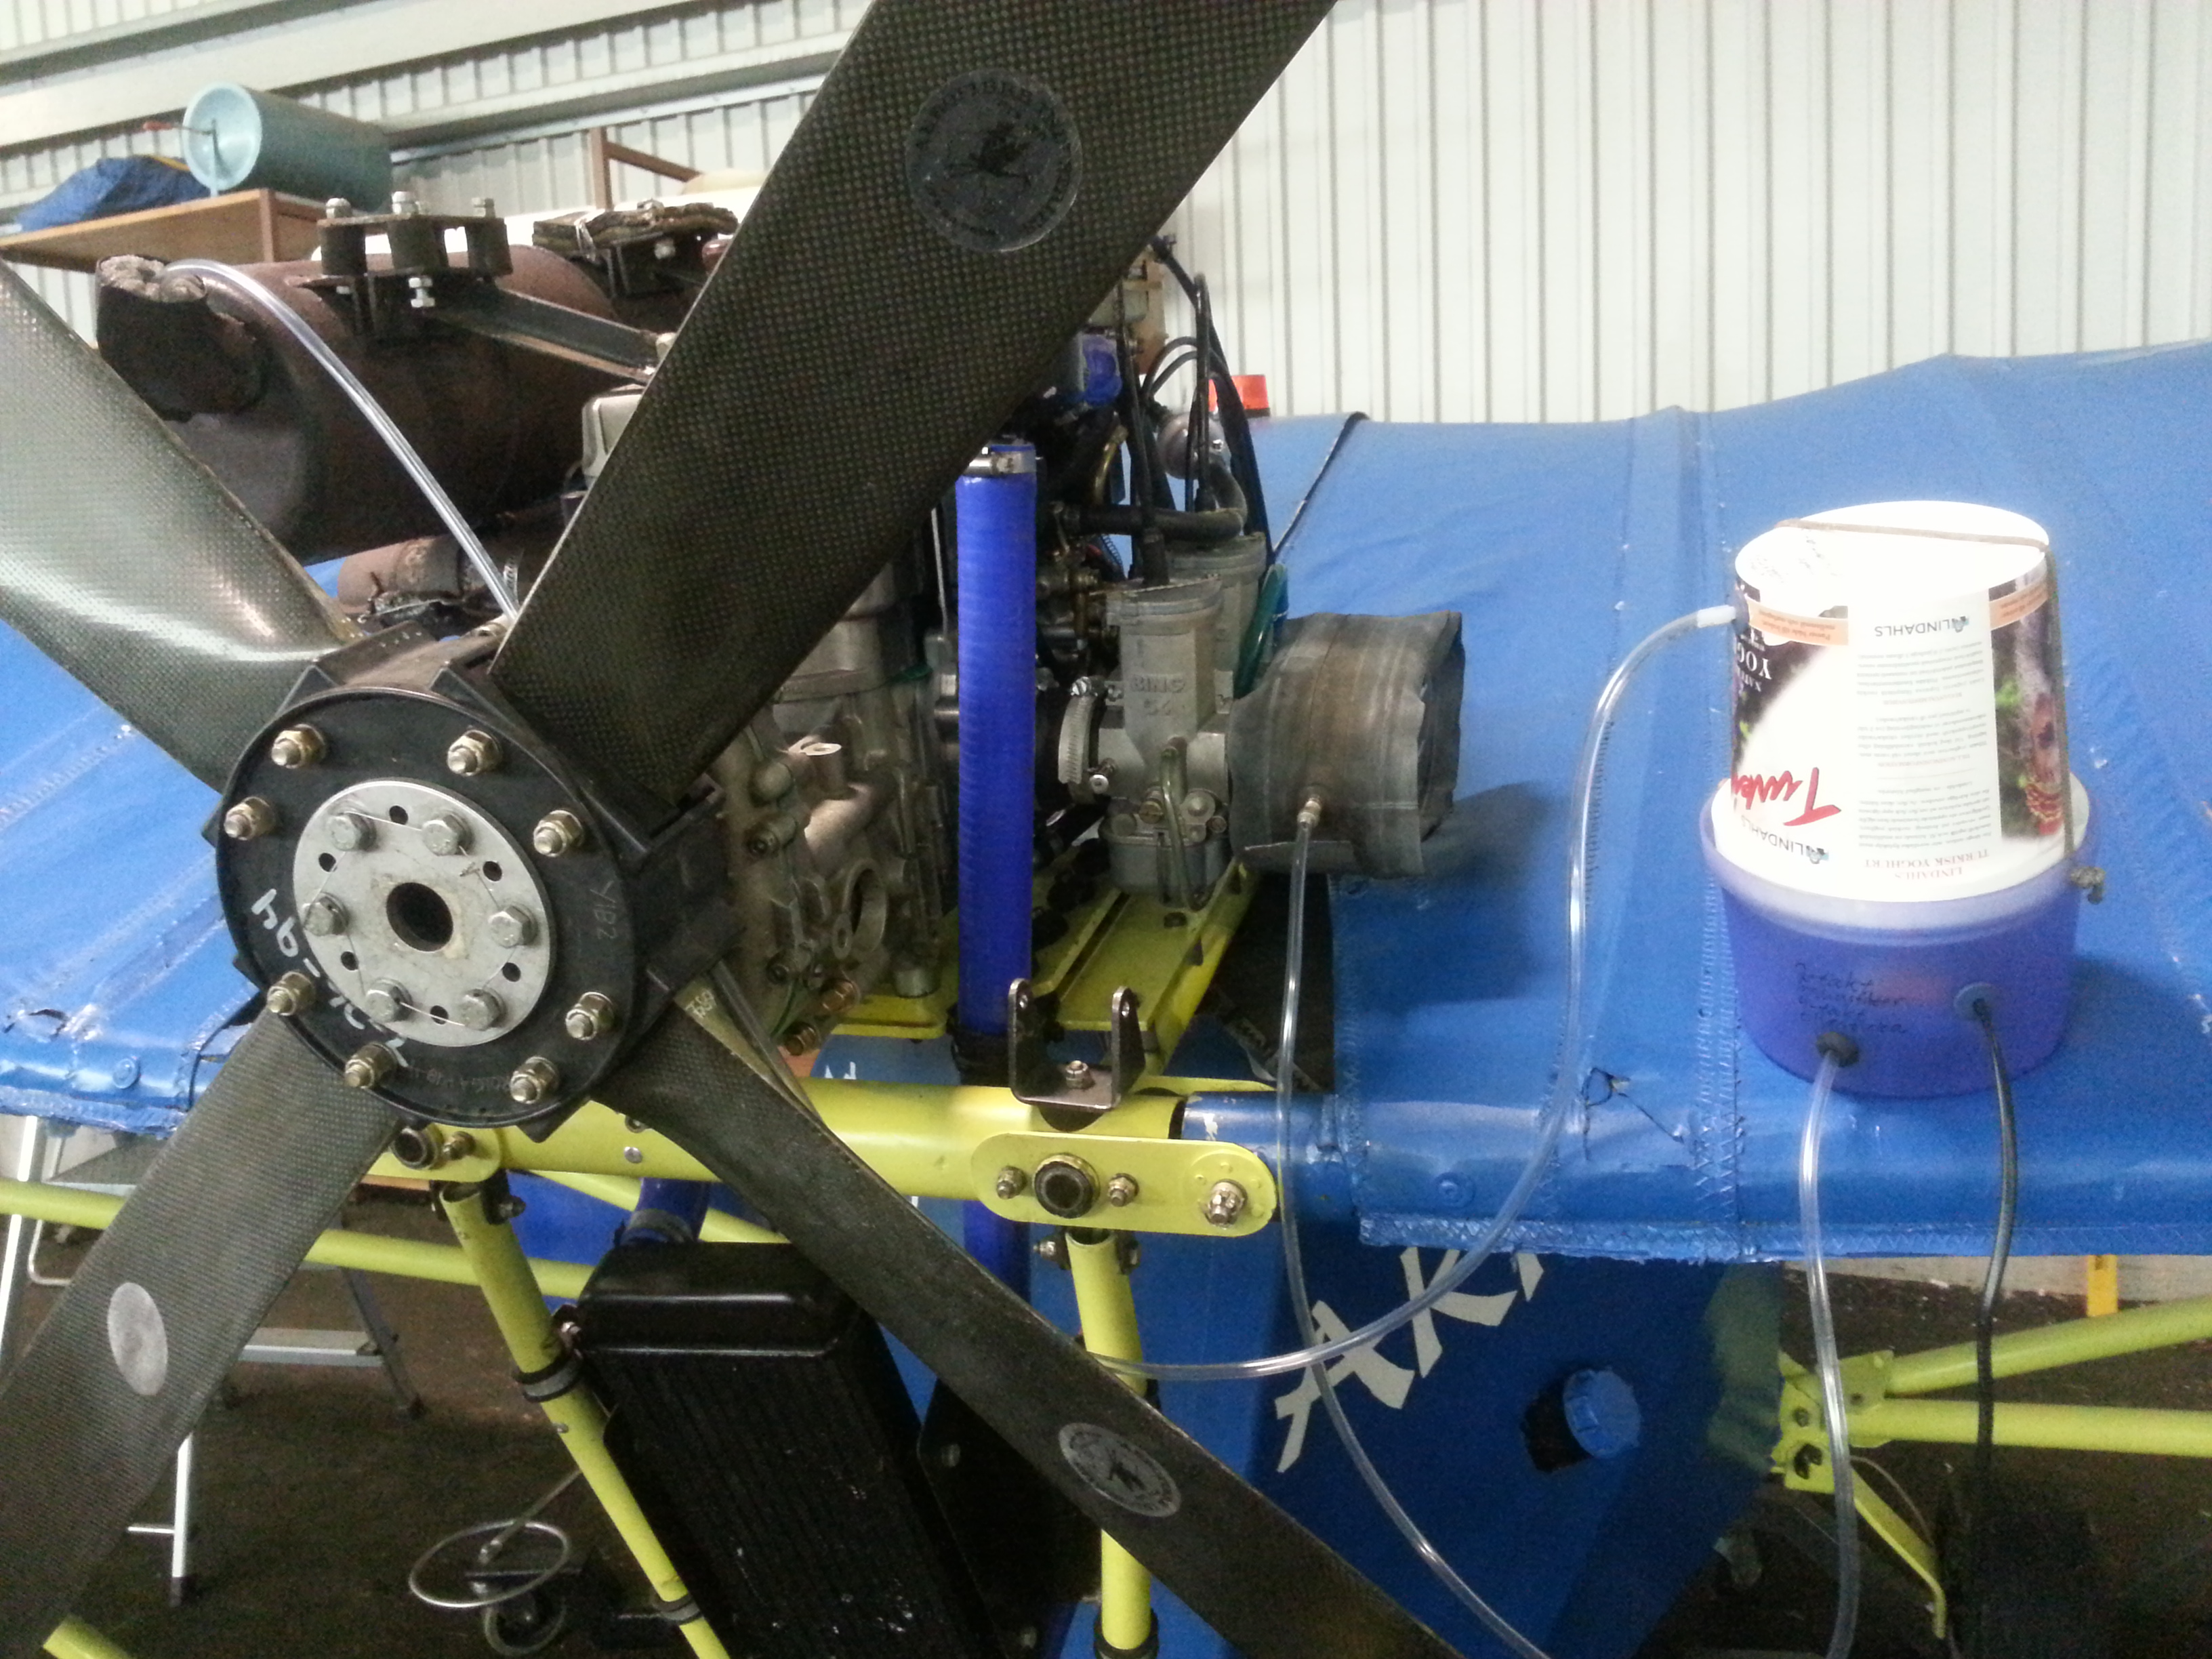
All engines should be dehumidified when not in use. Our hygroscopic synthetic oils and much groundtime , increases the risk of corrosion and rust in the engine. The crankshaft and its bearings in a two-stroke are very vulnerable and is also the most costly to replace. It seems that many have forgotten about all these two-stroke engines found in many ultralights. I have built a simple dehumidifier for my Rotax 582. The problem has been to get hold of Blue Silica Gel. Bluegel is very unhealthy and environmentally harmful, why availability has decreased. Nowadays, there is a yellow variant that is more environmentally friendly , but rather expensive . The color of these changes when the gel is saturated with moisture.
After some googling and searching in shops I’ve found cat litter made of Silica Gel. It has no color, but you simply replace / dry it regularly. You can dry the gel in the oven for 2 hours at 200-250 Celsius degrees. The price is lower than the Yellow gel and I’ve found it at my local food store. I intend to have the dehumidifier standing on a letter scale to see when the gel is saturated with water. I will also measure the moisture content in the engine exhaust pipe to verify the function . Below 40 % relative humidity the corrosion attack stops .
This dehumidifier is also suitable for 4-stroke engines with wet oilsump like Lycoming and Ww . A good video demonstrating a similar dehumidifiers, is available on Youtube here: https://www.youtube.com/watch?v=AQRZBwzU54Q
It is difficult to dehumidify a Rotax 912 with its dry oilsump. I’ve seen solutions where you let a desiccant dehumidifier with a hose, blowing dry air in to the engine ram air inlet. Plugs cut out of foam was used to seal the engine compartment. A hose branch can be used to dehumidify the cabin etc. .
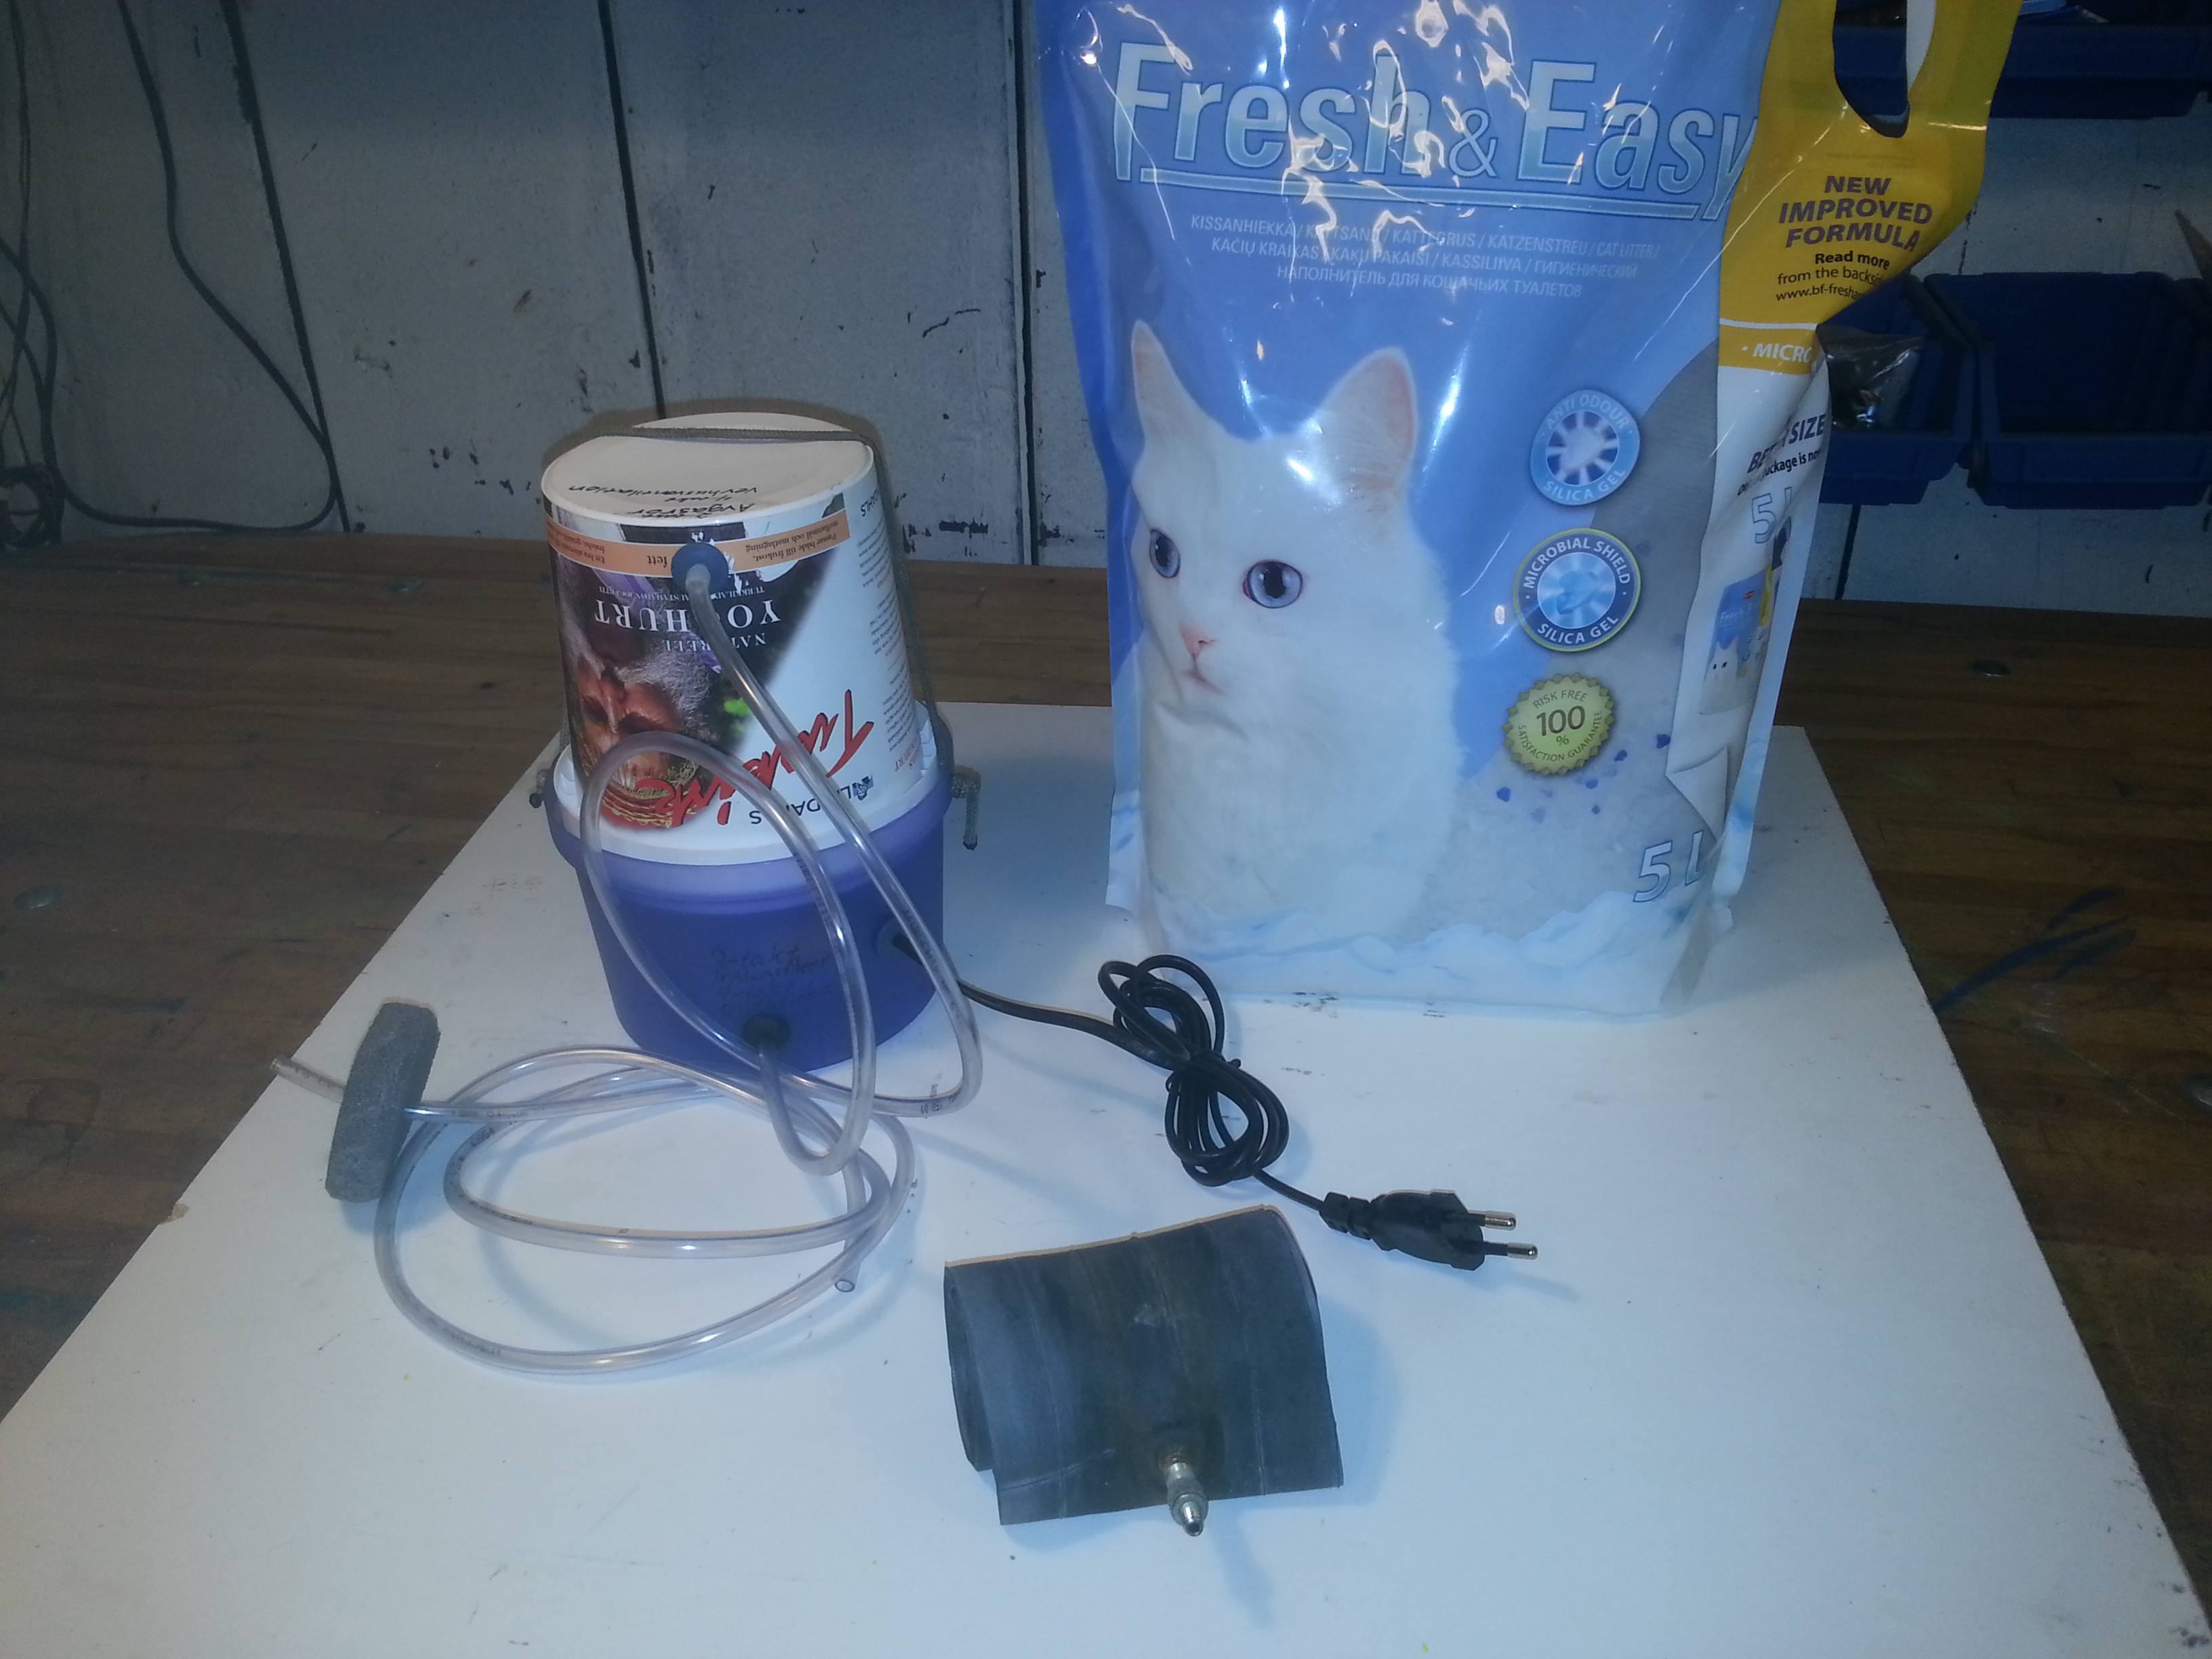
Shopping list.
Crystal Cat Litter (Fresh & Easy) or yellow Silica Gel
Two plastic box/jars/cans that fit together tightly
Aquarium Air Pump 100L / h with 1 hose connector (pet shop).
5mm inside diameter PVC tube (auto parts store)
Felt mat (pet shop) or vacuum cleaners filter.
3 x Rubber Grommets 5mm In. Ø (auto parts store)
2 Splice Connector and shrink tube / electrical tape for the Air pump electrical cable.
Wide bicycle tube.
Plug in rubber, foam or blue Styrofoam for the exhaust pipe.
A 5mm piece of string or rubber rope . Approximately 0.5 m long
Assembly
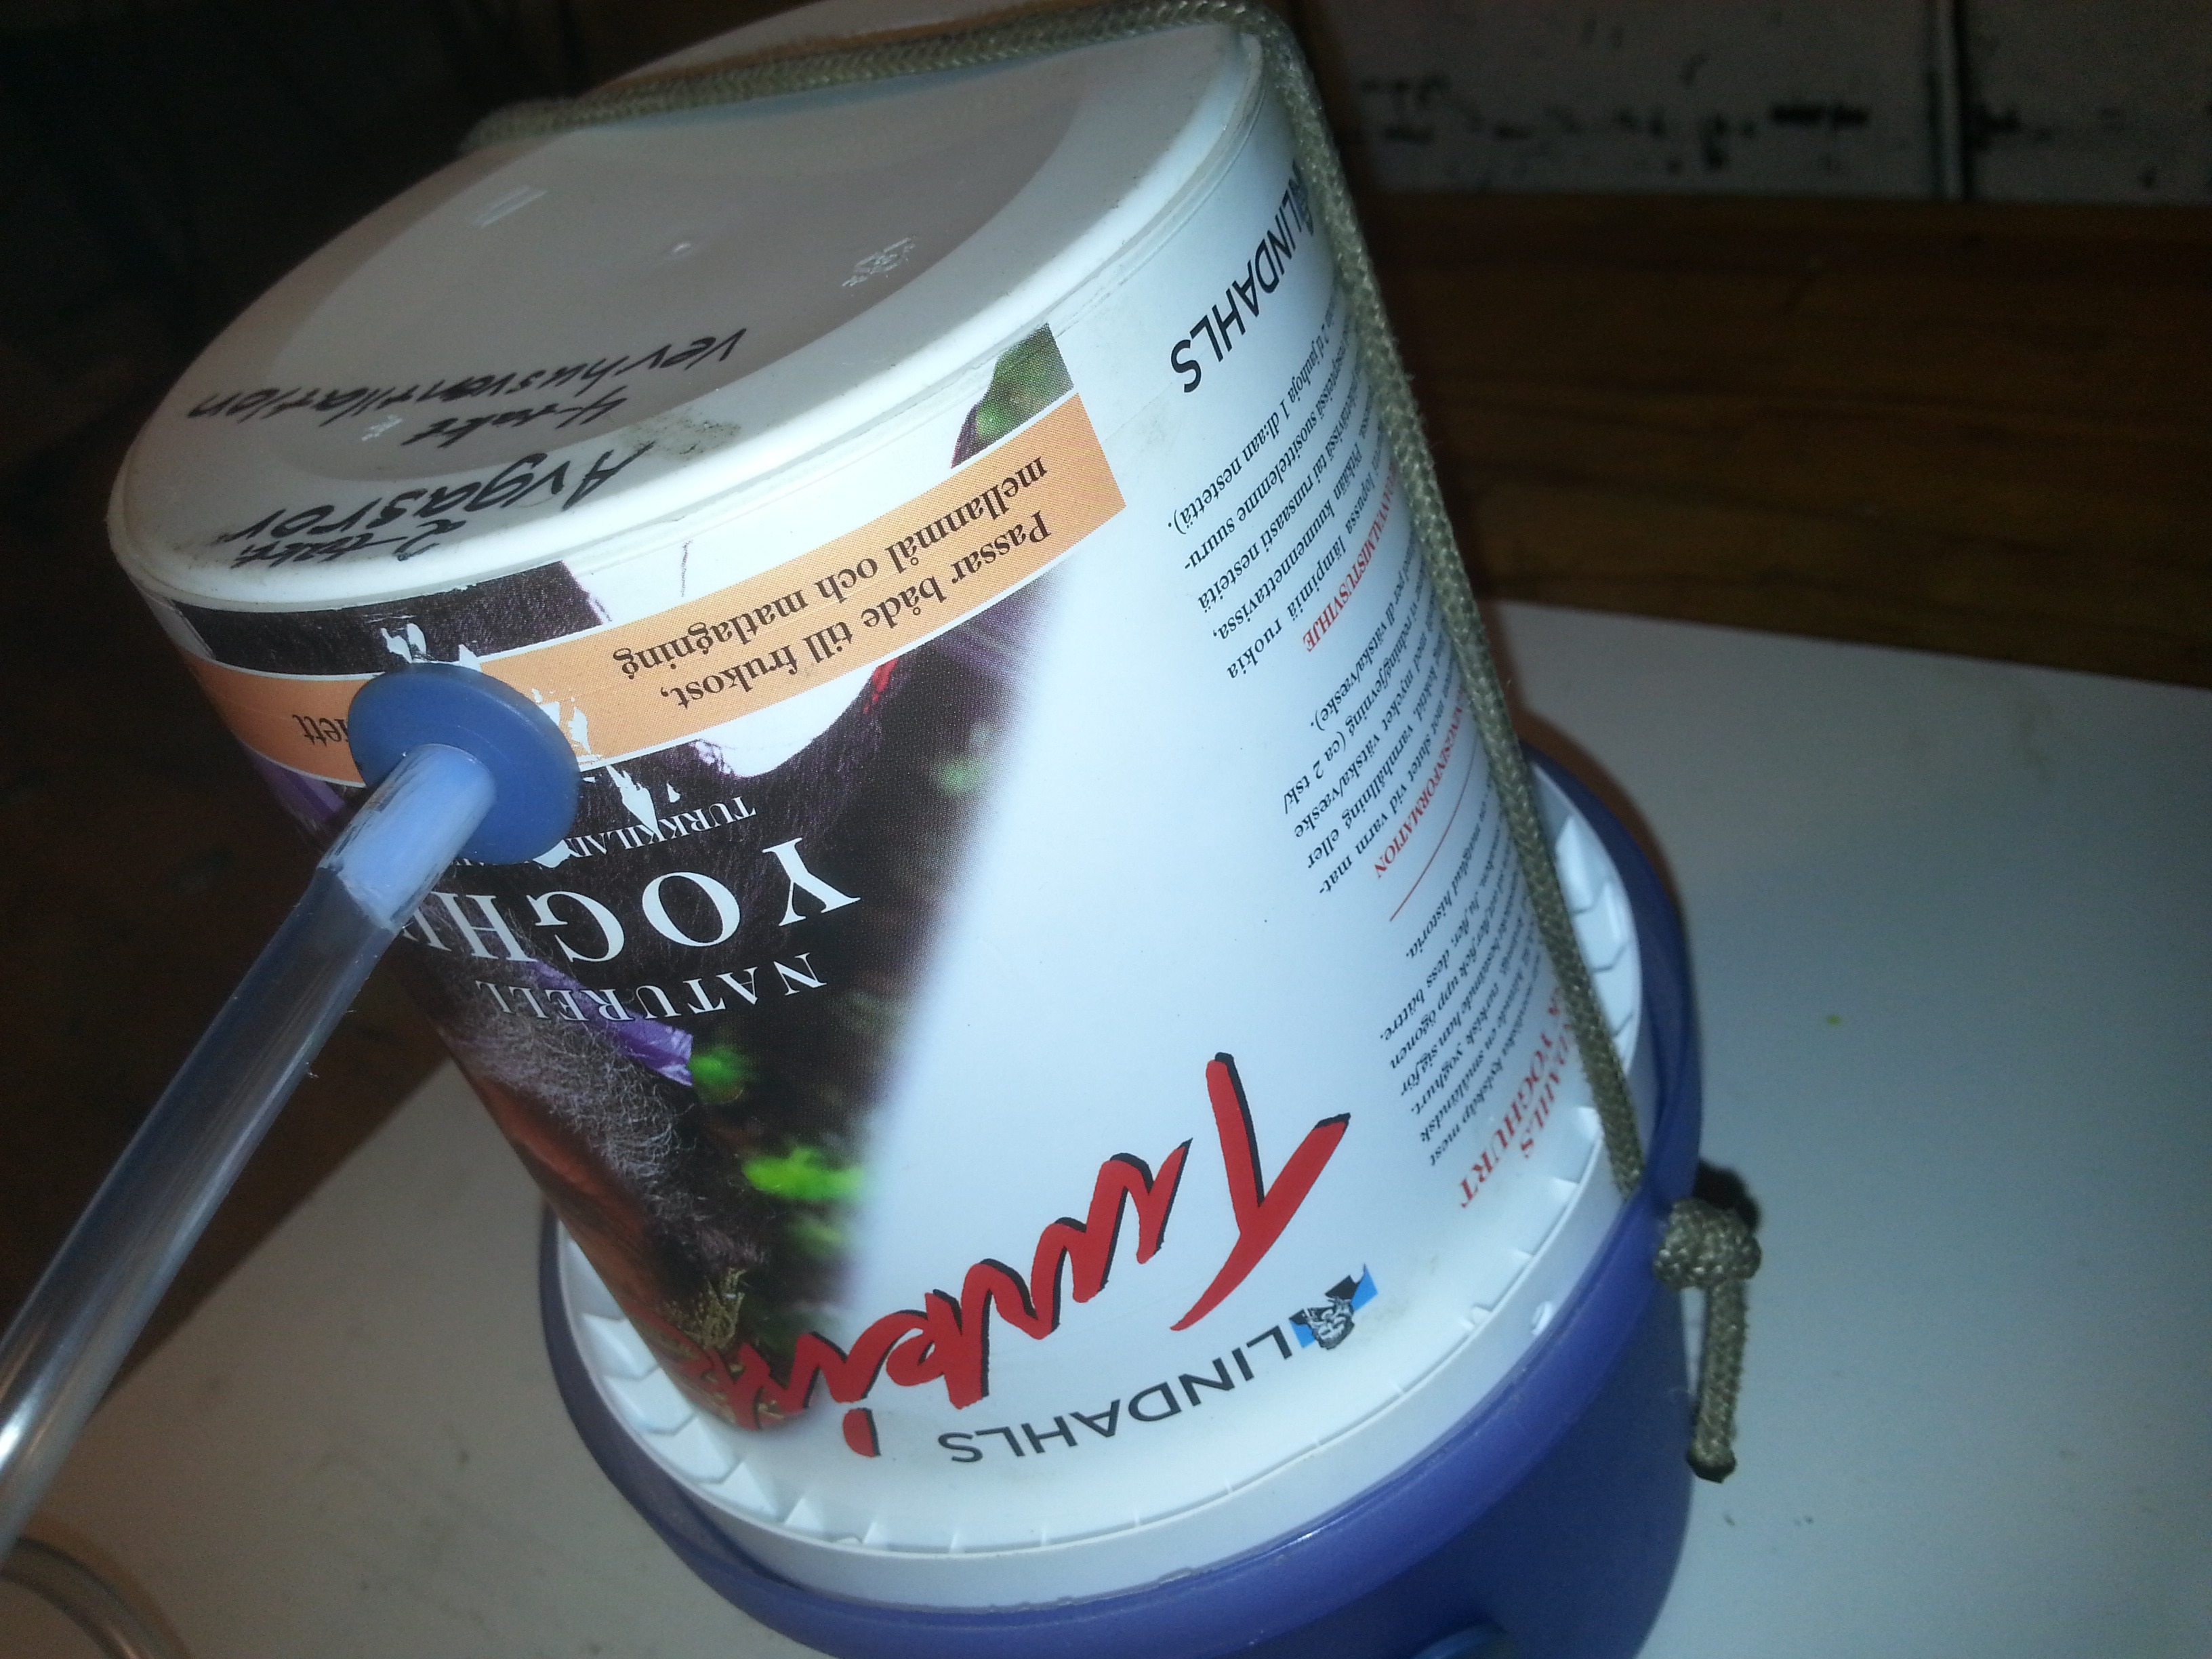
1. The parts should fit well together. The negative pressure created by the air pump contributes to the sealing of the cans.
2. Install a rubber grommet in the top can and two in the bottom can. The holes should be 2-3
mm smaller than the grommet outer diameter. Be sure to get clean, round holes, it seal better
then. The rubber grommet should be small enough so that the hose or cable can be pushed through with little violence and Vaseline. Insert a hose into the top can rubber grommet, allow it to protrude about 5 cm.
3. Cut off the air pump electrical cable 5cm from the pump. Insert the wire through one rubber grommet in to the bottom can. Splice the cable, use butt splices and heat shrink tubing on the .
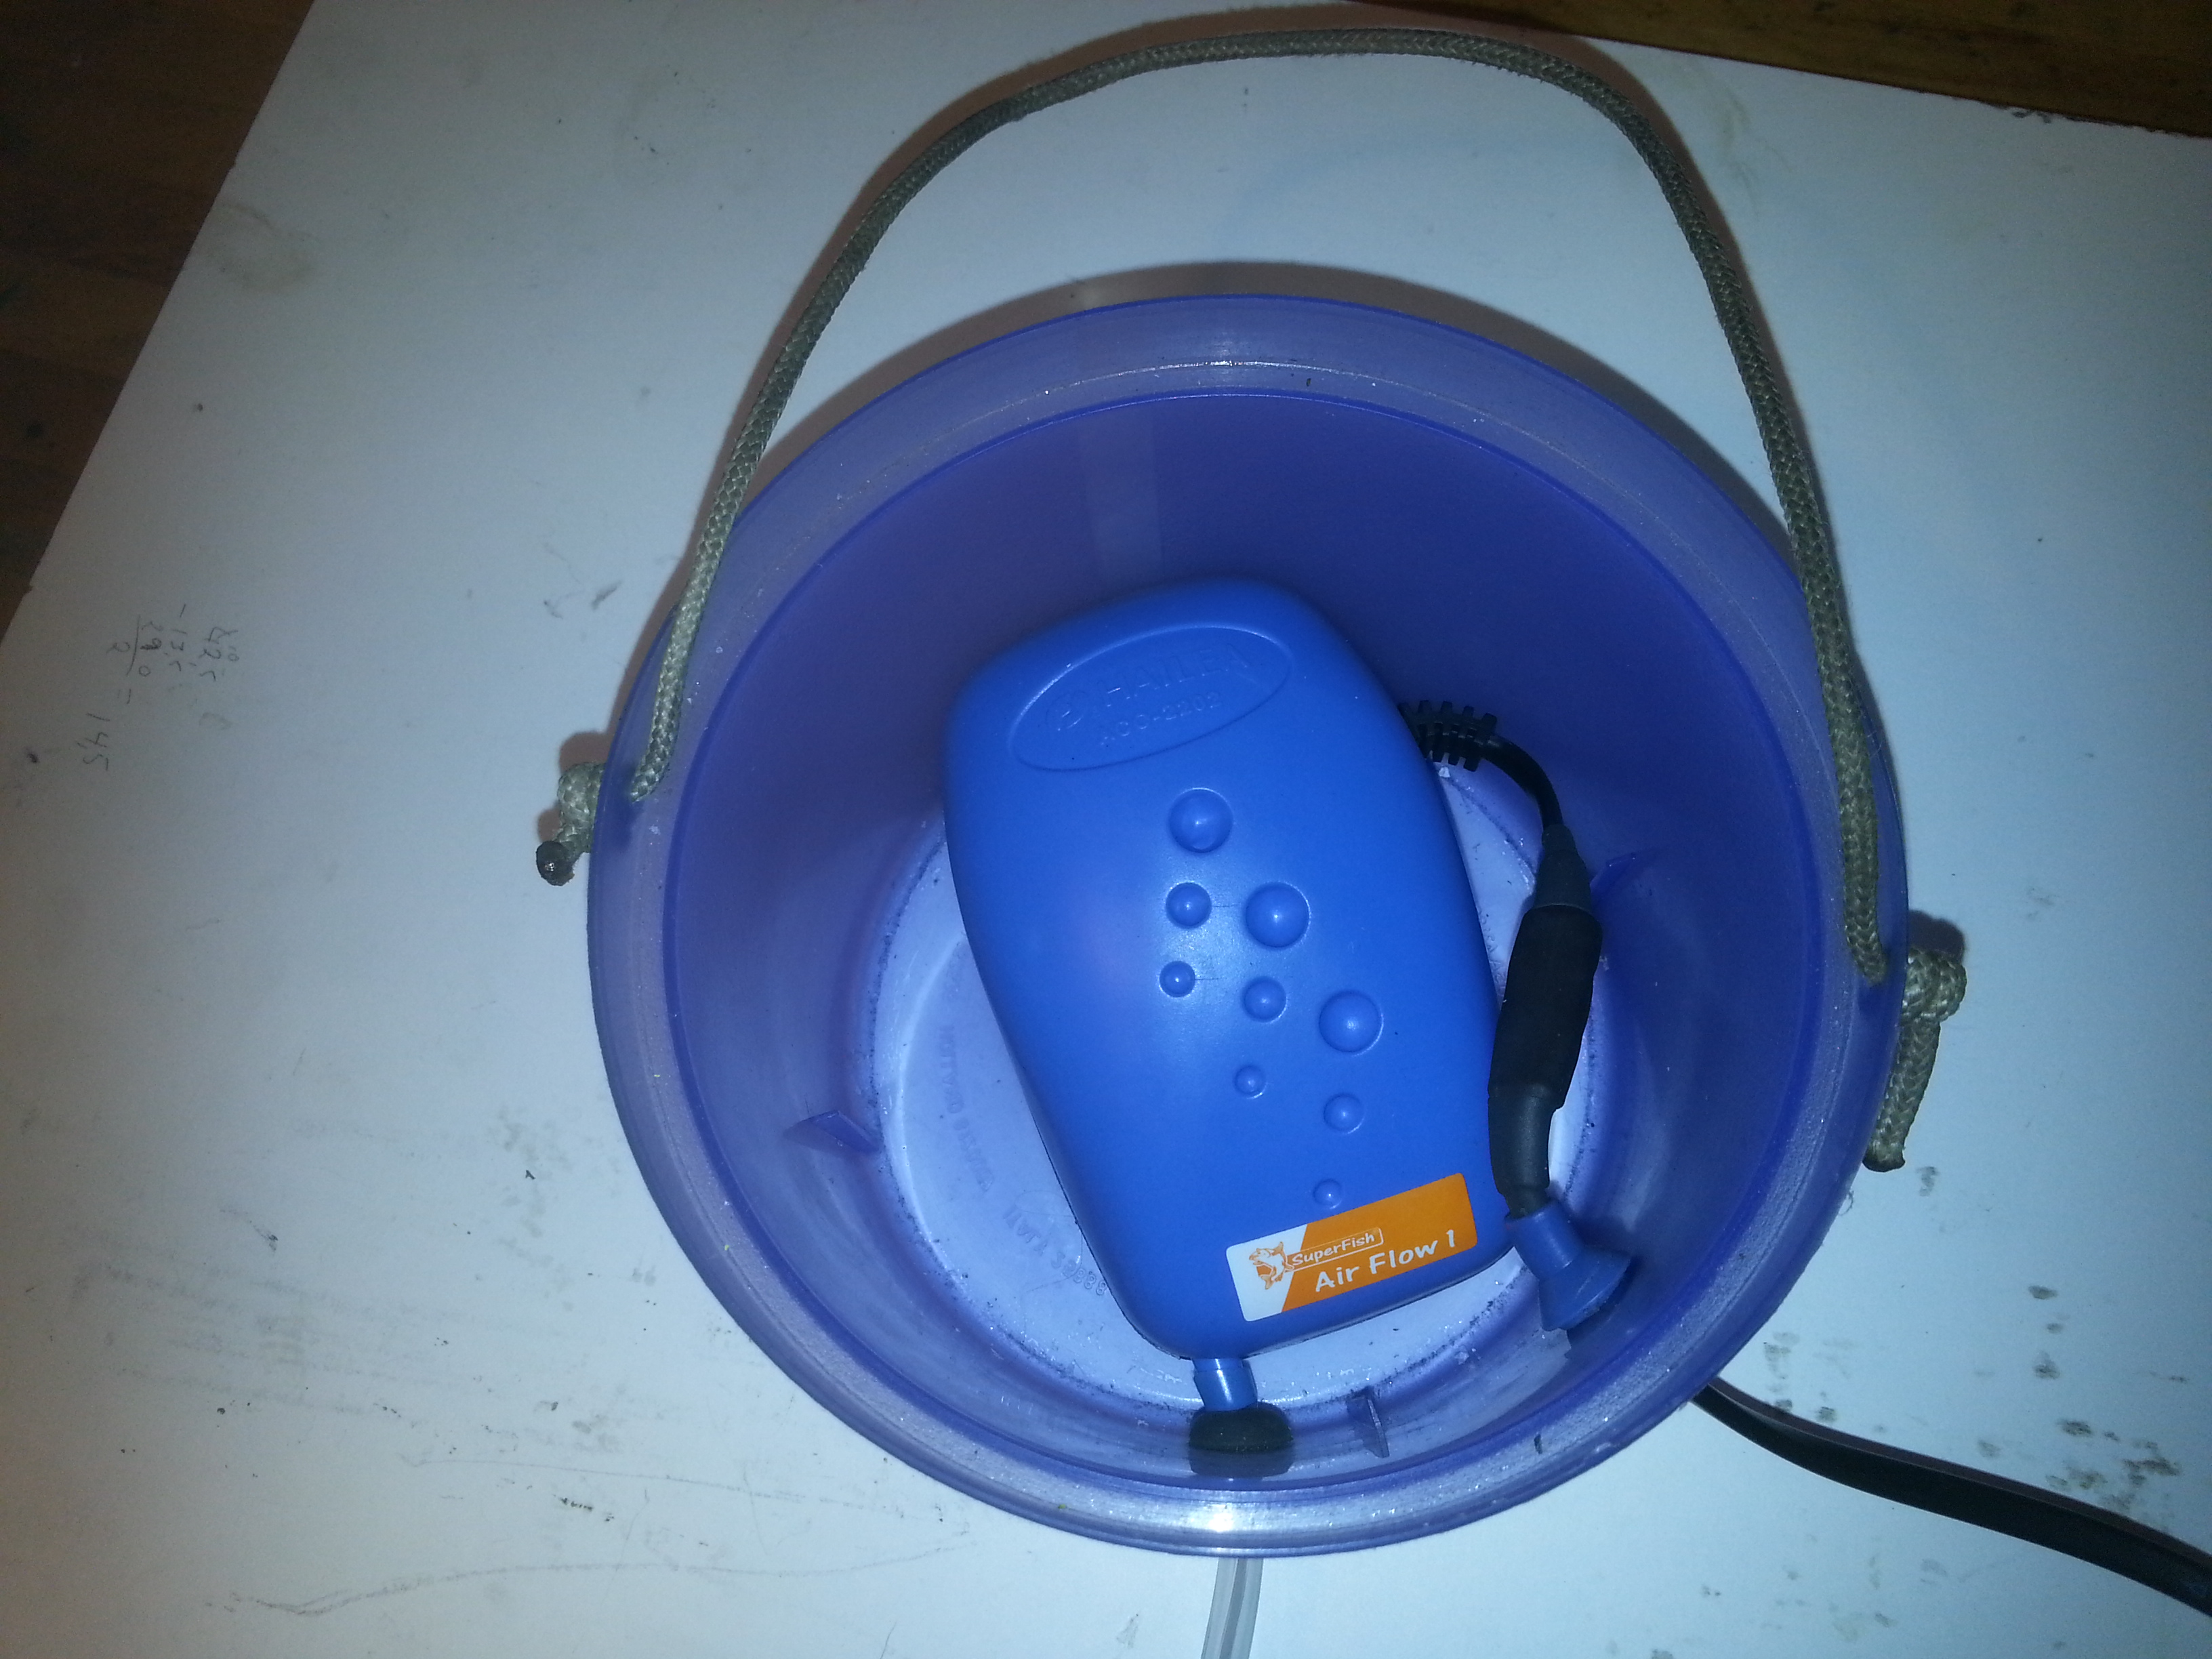
4. Place the pump in the bottom can. Insert a hose through the second rubber grommet and connect it to the pump.
5. Drill two holes in bottom can flange and mount the rope as shown, but do not tie one end yet, this will hold the cans together later.
6. Drill approx. 50pcs 2mm hole in the top can lid.
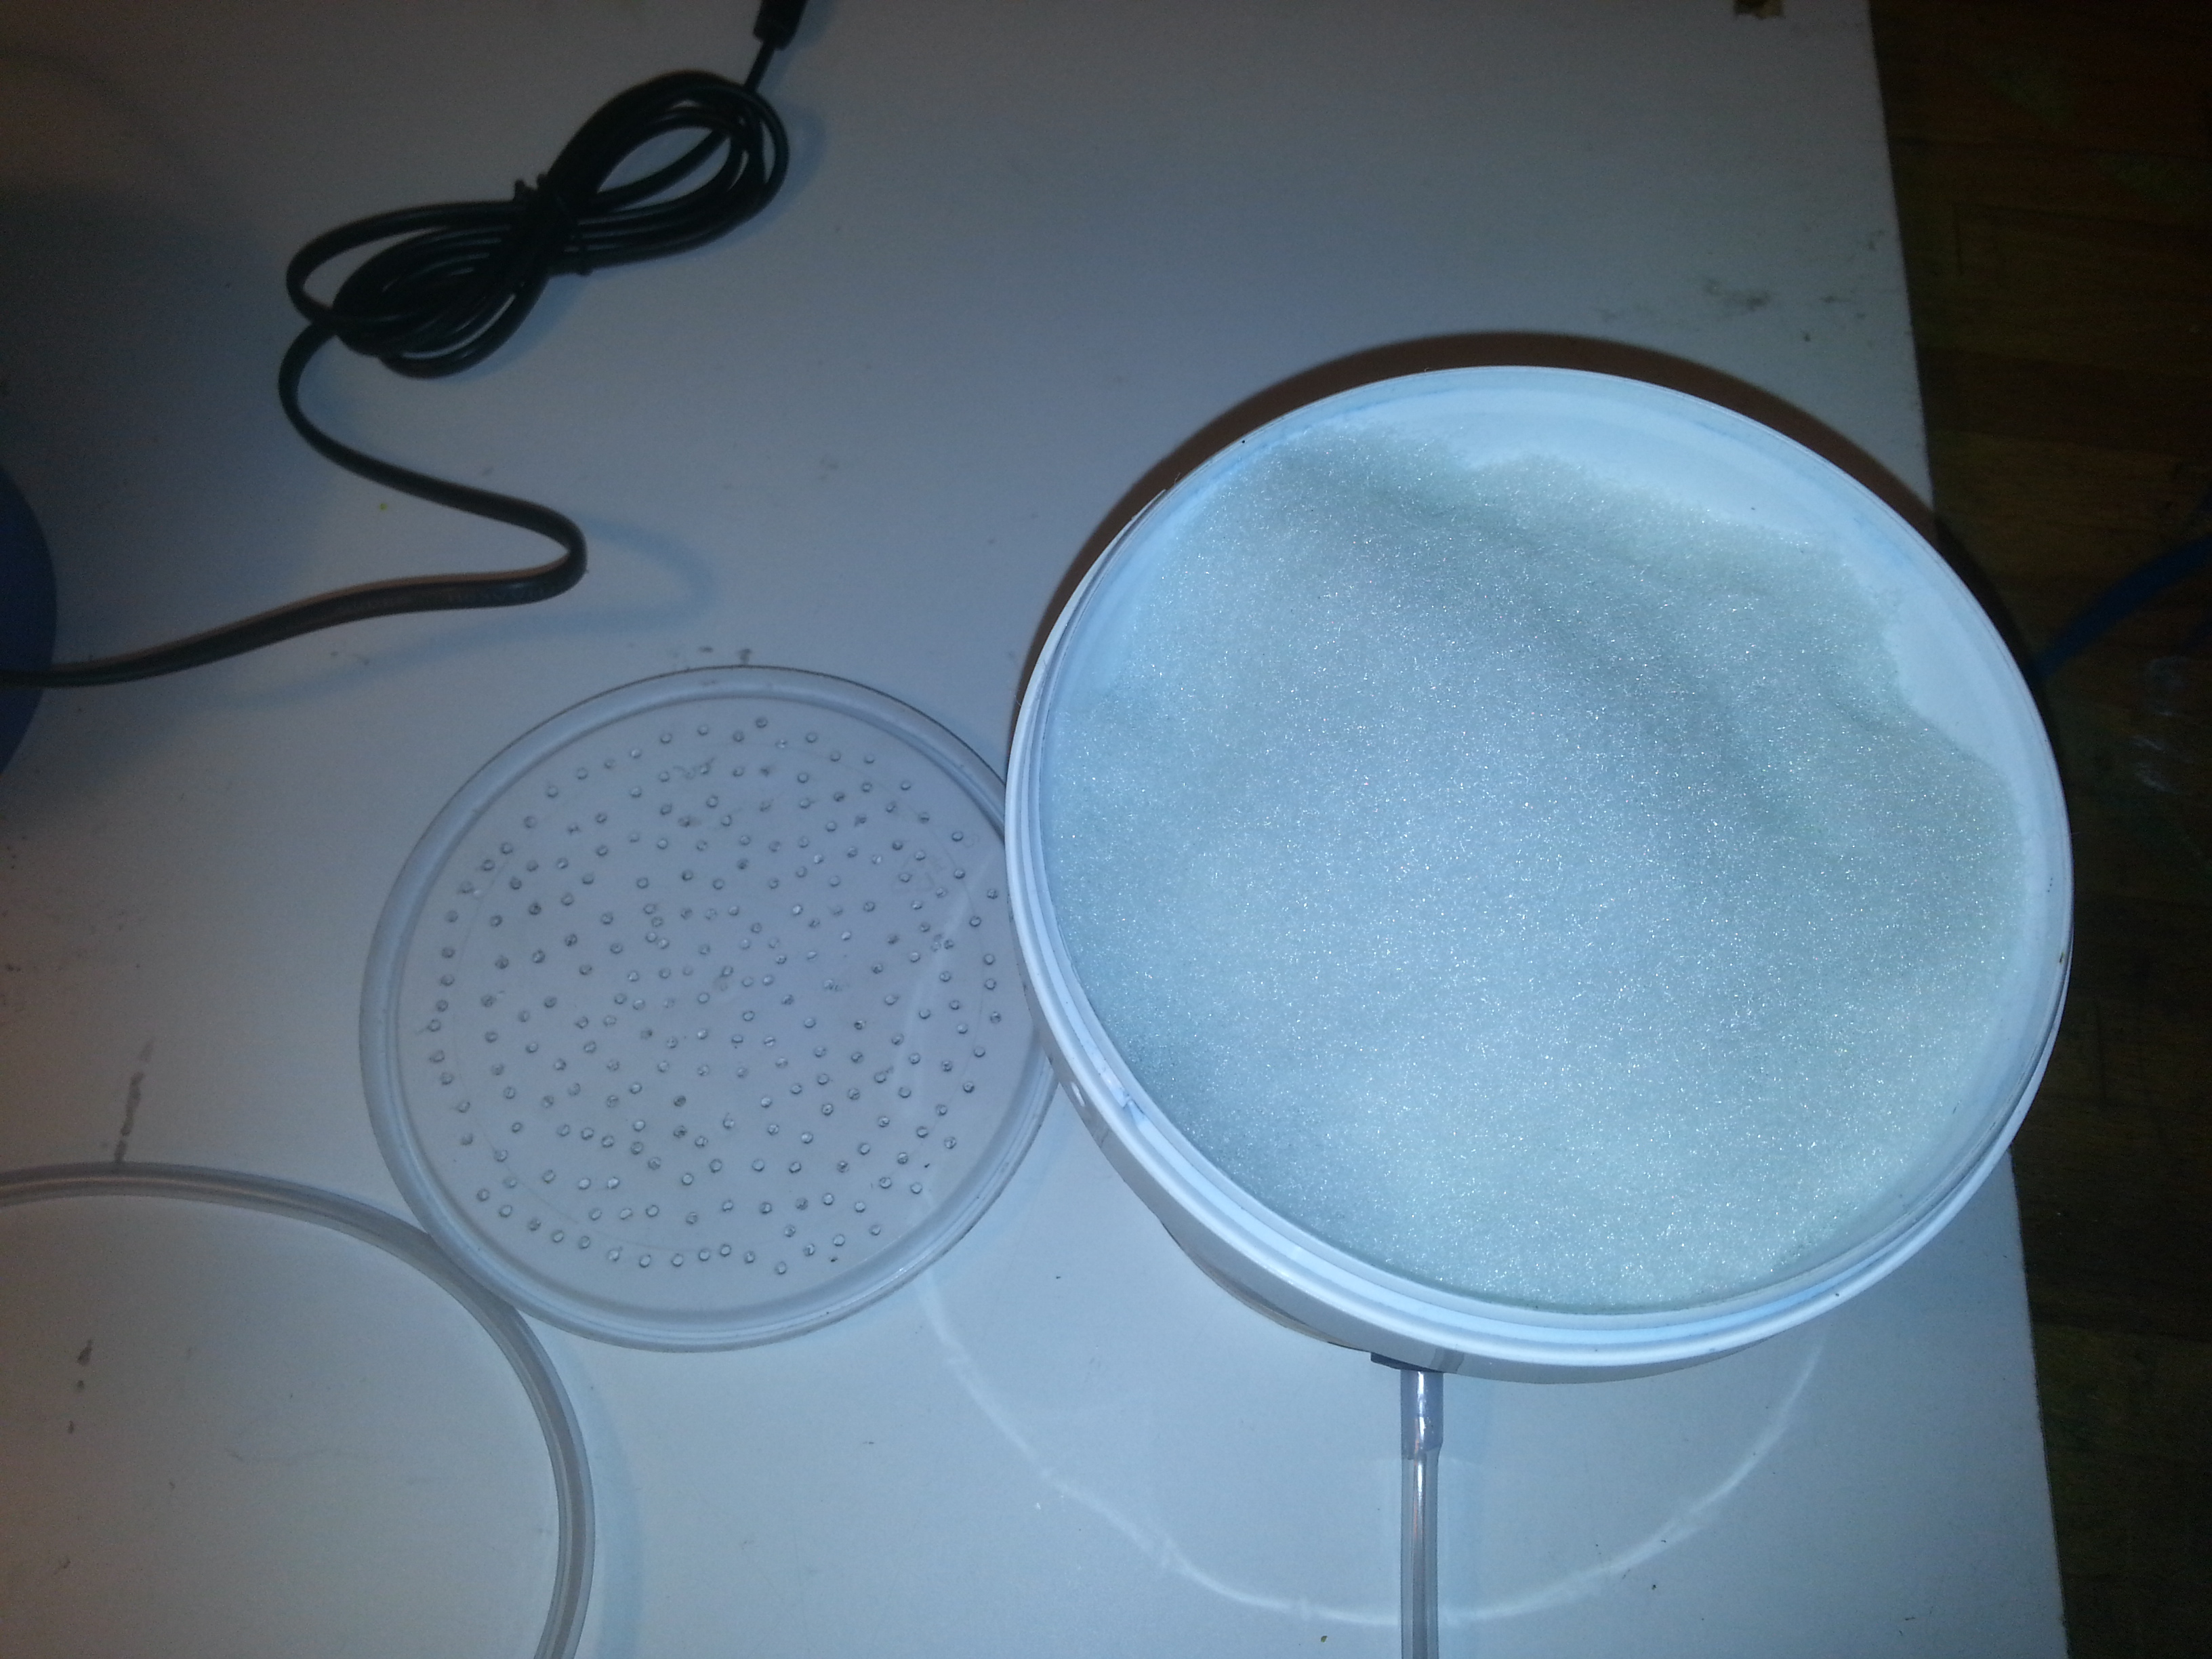
7. Cut a felt pad so that it fits the top can.
8. Fill the top can with Silica Gel and add a filter or felt padding on
the top. Install the lid.
9. Cut of a bicycle tube . Share it lengthwise and glue the short ends together with contact adhesive ( First clean thoroughly with solvent and sand the surface ) . Adjust the length so that it fits tightly around the engine air filter. The hose must be wider than the air filter. Connect pump outlet hose to the bicycle tube vent .
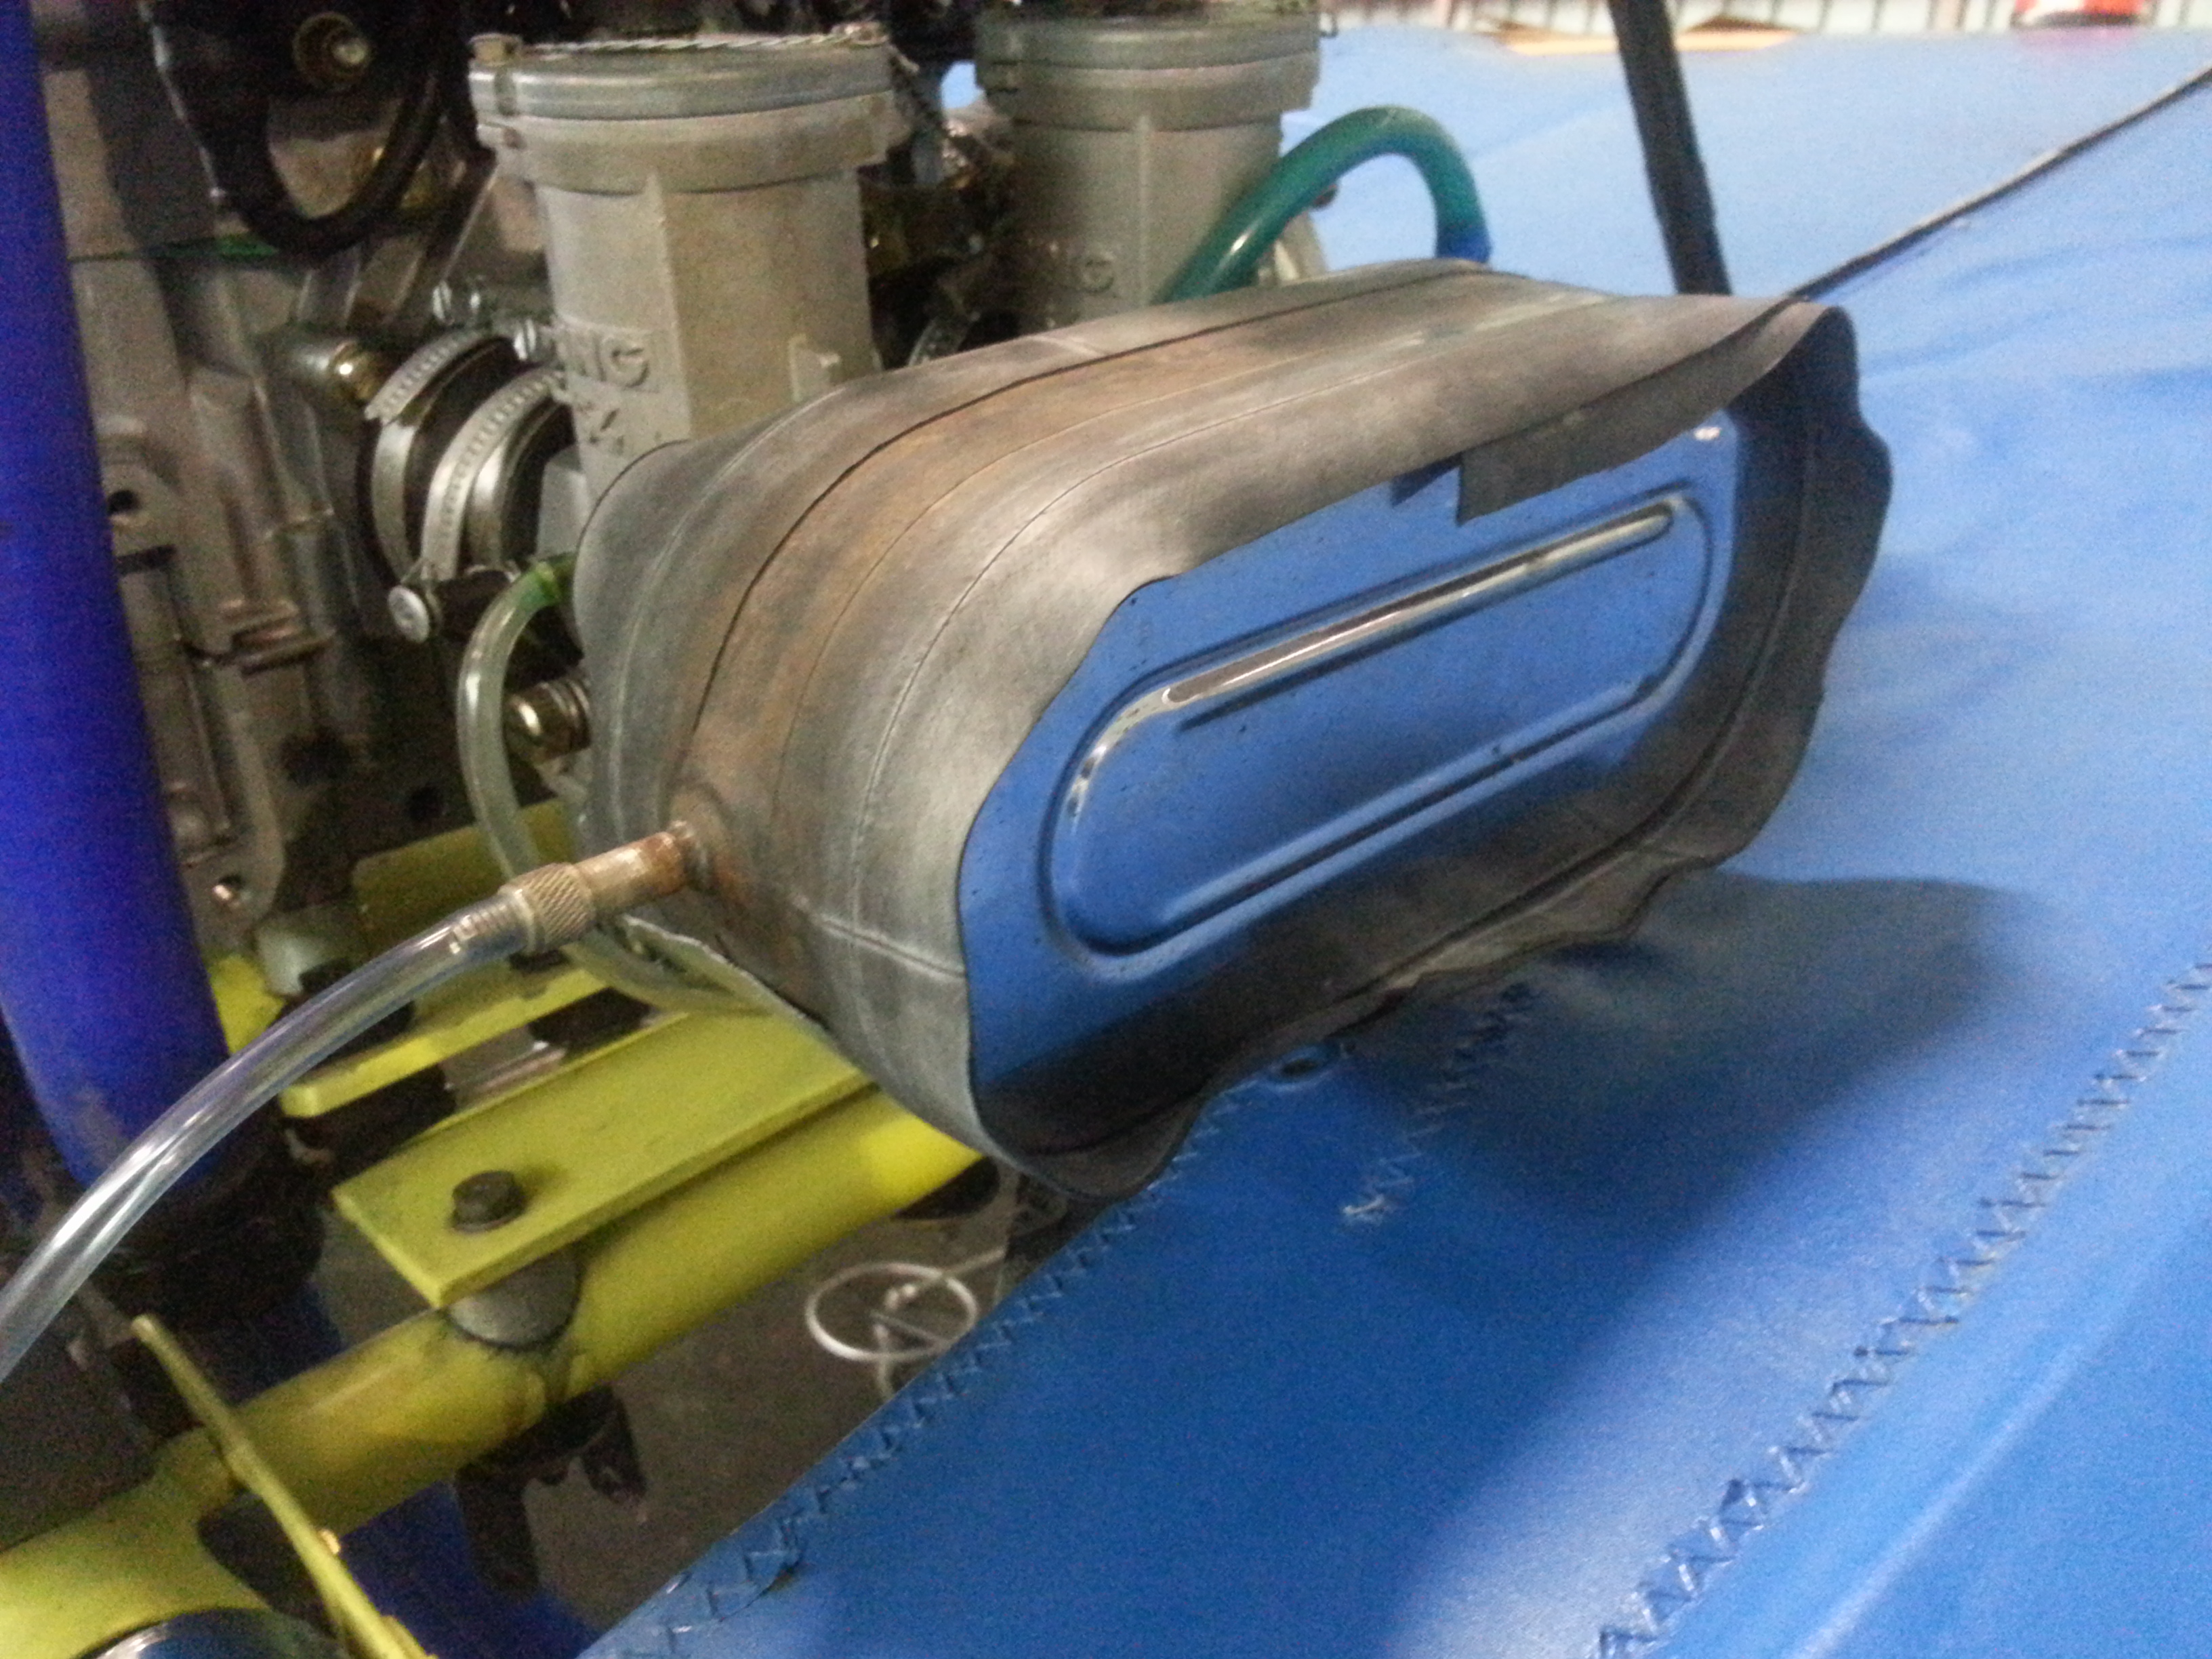
10. Drill a hole in the exhaust pipe plug. Connect the top can hose into the exhaust.
11. Assemble the cans and tie the other end of the rope. Adjust the rope length so that the cans are held together snugly. When the dehumidifier is not used, you should plug or clamp the hoses.
Good Luck! Feel free to contact me with questions or tips for improvements!
Happy flight this summer!
